
Hi there!
A few illustrators recently reached out to me asking questions about self-publishing. I’m no expert here, but I have learned so much from the million mistakes I made. In this post, I’ll share some tips for illustrators who are new to self-publishing and digital illustrations. Read on for some key insights and advice.
Subscribe to a Professional Illustration Program:
There are a million free illustration programs on the web that are tempting to use. Trust me, spend a few dollars on a professional program and it’ll save you a ton of trouble later on.
I started my book with free programs. It wasted hours of my time after which I realized why the programs were free in the first place. They absolutely cannot replicate the quality of work you can produce in a program like Photoshop. And the quality really matters when you go to print your work.
Here are some horrible scenarios I went through before finally switching over:
- One of the programs was saving blank files. I didn’t realize this until I had finished 3 illustrations and went to open them. I couldn’t recover any data and had to start over.
- Another program wasn’t letting me download in high print quality or as PSD so the work I did on it was a waste.
- Yet another program kept freezing and changed brush sizes randomly.
Seriously, saving those few dollars is not worth it. I had to redo all my illustrations after weeks of trial and error. I know I sound like an advertisement for Photoshop but I’m just trying to save you some trouble.
Learn How to Use Your Program:
Whatever program you decide to work with, learn how to use it first. With Photoshop, I didn’t know that their general brushes weren’t of good quality, that you could download a variety of very high-quality brushes for free as a subscriber, or that there were ways to add colours to your drawings in many quick and efficient ways.
I already had a basic understanding of the program but if you see the quality of my illustrations from a year ago to now, you will notice a huge difference. Of course, I have improved as an artist through practice, but my increasing knowledge of the program has also helped tremendously.
In hindsight, I wish I had taken a crash course before starting to use the program. Again it would have saved hours of my time and tons of frustration.
Next week’s post might end up being on Photoshop! Moving on…
Understand Book Formatting:
Start drawing after you know what you want your finished book to look like. I published my book on Amazon so I’m including a link to their guides here and here.
Whichever platform you decide to publish on, remember to research their publishing process thoroughly. Pay special attention to these areas:
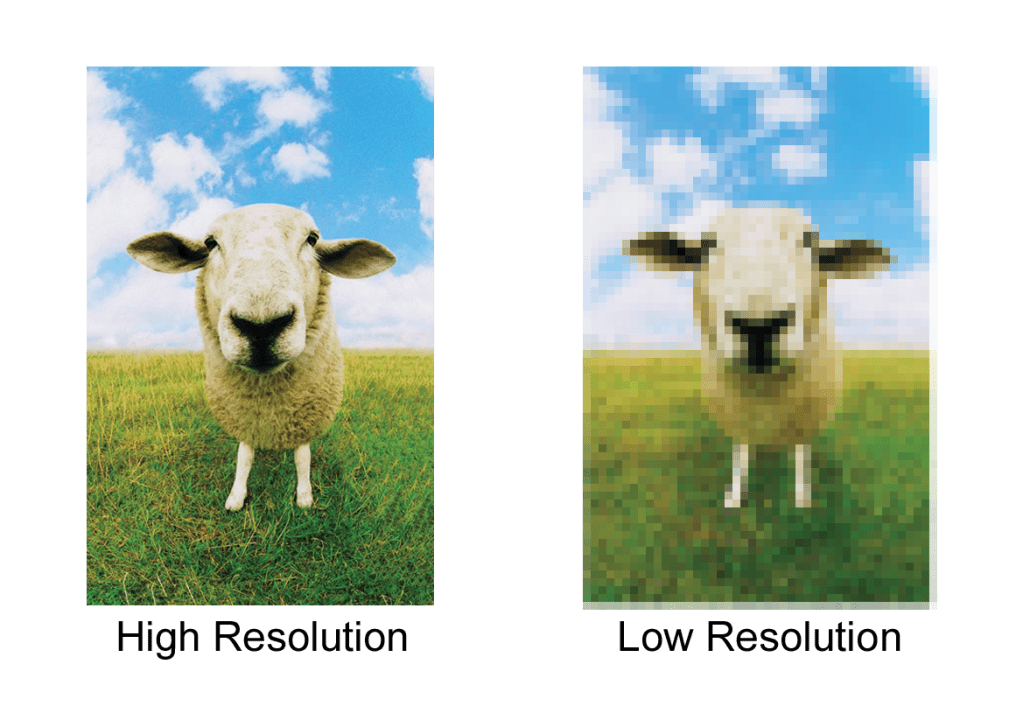
- Size: Which sizes will your self-publishing platform print? Choose one of their options and create illustrations of those sizes. This is so basic and yet it’s something I didn’t think about. Also, make sure your images are at least 300 DPI. You want them to be at a high resolution otherwise they will print out looking pixellated like the image on the right.
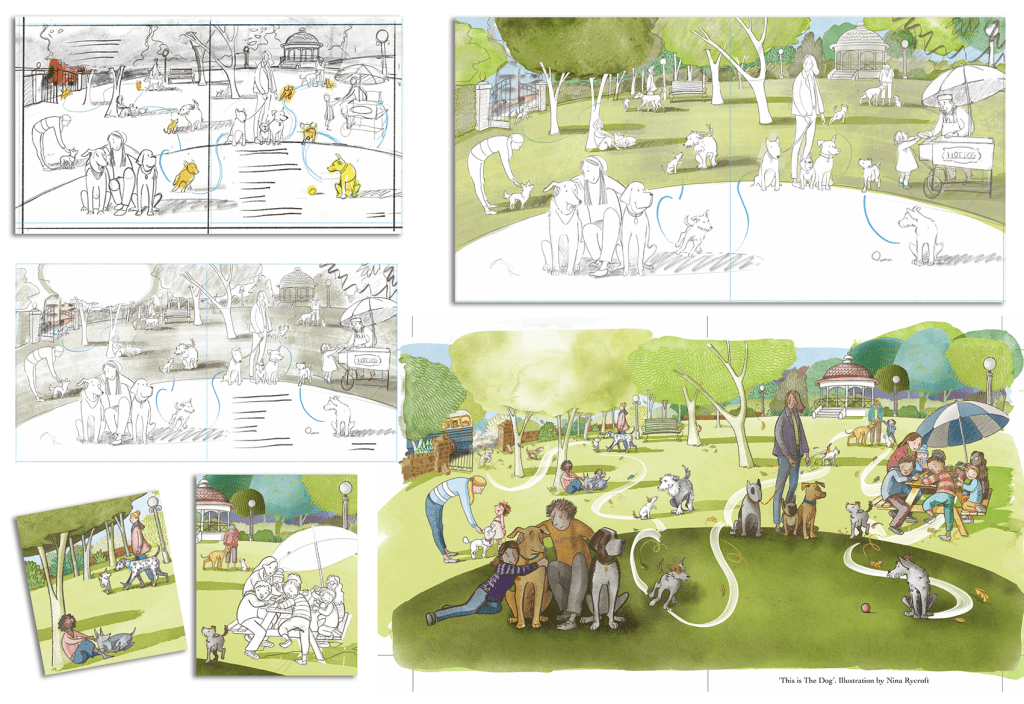
- Gutter: If you’re doing spread illustrations (illustrations that take up two pages), make sure you don’t draw anything important or add any text in the middle. Your illustration will be folded as a book and you don’t want any important details to get lost in the gutter. Again, I had to change my illustrations after realizing that my illustrations would look very different in a book format. I’ve included an example of a great illustration by Nina Rycroft which shows how to work around a gutter.
- Margins: Just like the gutter, you want to make sure there is no important information in the margins (the edges of your book). Research your publishing platform to understand how much space they recommend you leave at the margins as these can get cut off during printing. Look at the illustration by Lauren Child below and note how nothing of importance is near the edges of the page. If you want more information on formatting your children’s book, here is a great article.

- Format: If you’re publishing your book in multiple formats, understand that it will look different as an ebook, a paperback, and a hardcover. I published How to Show Love as a paperback and an ebook and the illustrations appeared very differently on a tablet versus my daughter’s hands.
- Colour Mode: Umm, I was working in RGB and freaking out about why the colours weren’t turning out right in print. Soo… make sure the colour mode your files are set at is CMYK. It took 5 tries before I understood that RGB is best for viewing images on the screen and CMYK is best for printing. If you’re even slightly familiar with printing digital images, you’re probably smacking your head reading about this rookie mistake. Below is an example of what RGB versus CMYK colours looks like. You can learn more about colour modes and how they affect printing here.

- Time: I thought I would be done in 1 week… maybe 2? It took 3 months. Expect it to take a long time. It’s a huge learning curve but you’ll get there!
Research Your Target Audience:
You need to know who you’re writing for. Of course, you are writing for yourself first, but you also need to know who your customers are and what their expectations are. If you’re writing for children, knowing the age of your readers is of the utmost importance. No book will attract children of all ages. Having a specific age range in mind will help you determine the following aspects:
- Number of words
- Number of pages
- Style of illustrations
Knowing your target audience will also help you understand what kind of books are already selling for your market. You can study these to make sure your book is following the same standard. You wouldn’t want to have a 500-word board book or a 10-page picture book. If you’re writing to sell, this research is essential to marketing your book.
I really hope some of these tips will help as you go on your self-publishing journey. Let me know which ones you put to practice in the comments below!
Stay tuned for more posts about using Photoshop, valuable resources that will help you self-publish successfully, and whatever helpful info I gather as I go continue down the book publishing path!
You can check out my book, How to Show Love, here.

One response to “First-Time Book Illustrators: Top Mistakes to Avoid and Essential Tips for Success”
[…] right into marketing here, but if you are still at the formatting stage of your book, check out this article. And if you are looking for resources that go more in-depth into self-publishing, take a […]